

First, open the following website by clicking on the highlighted words in this sentence, or on the picture's caption.
 |
| Click Here to Open QR Stuff.com |
Follow the numbered directions to create your QR code, starting with #1: Data Type. I chose to link to a website, but you can choose anything from the list. The following picture shows this highlighted in red.
 |
| Choose Your Data Type |
Next, open a new tab on your computer and go to the site for which you want to create a QR code. For this example, I am going to create a link to Kiddle, which is Google's new image search engine for kids. Here's what the site looks like. (You can check it out by clicking on the caption, if you want.)
 |
| Kiddle Safe for Kids |
Next I'm going to highlight and copy the URL of the site, which is shown at the top of the next photo.
 |
| Copy the URL |
Go back to the tab with QR Stuff open. Paste the URL you just copied into the box on step #2, like this.
 |
| Paste the URL Here |
If you are using this site for business, you can sign up for tracking to find out how many people use the QR code. Click here if that's you. (Otherwise, don't worry about it.)
 |
| URL Shortener for Business Tracking |
If you want your QR code to be in a color other than black, you can choose other colors on Step #3. If not, skip to the last step.
 |
| Want a Different Color QR Code? |
Now your code is ready. Click the "Download QR Code" button for your free QR code.
 |
| Click "Download Now" to Get Your Free QR Code |
It should appear almost instantly on your screen, like this:
 |
| You Free QR Code Will Appear on Your Screen |
I suggest you rename the code, so that you can easily find it again later. Just double-click on the current name and type the name you want. I always leave the part that says, "qrcode" so I can search for them easily on my computer.
 |

Press "Enter" to keep the new name.
Now that you have your free new QR code, how do you print it and use it? Simple.
First, open your favorite word processing or presentation software. I like PowerPoint for its ease of use. Add a text box and/or type your instructions. For this example, I'm just going to keep it simple.
 |
| Type Title and Directions into Your Document |
Next, add the QR code. In PowerPoint I click on "Insert Picture" or "Insert Photo."
 |
| Click on "Insert Picture" |
Then I click "Picture from File" in the drop-down menu.
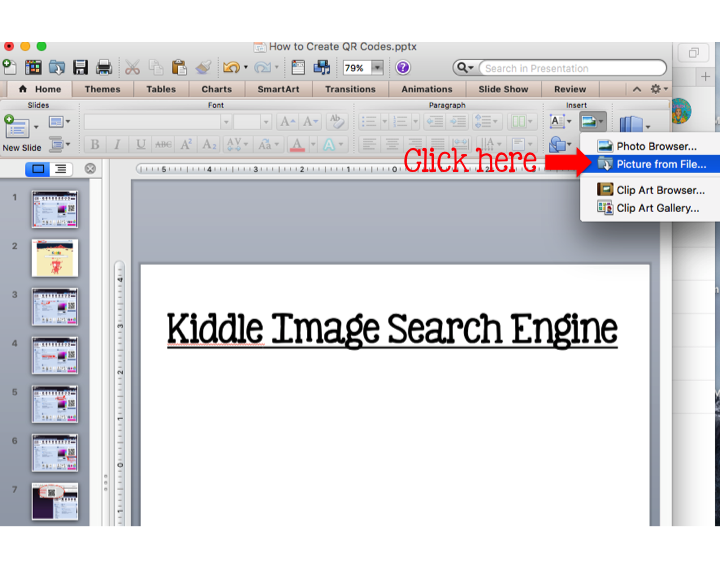 |
| Click on "Picture from File" |
I click on "Downloads." Then I find the file name I created and double-click on it to add it to my PowerPoint.
 |
| Follow These Steps to Add the QR Code to Your Document |
If I want to change the size, I left-click on the QR code and then click on "Format" in the drop-down menu.
 |
| Lets-click to adjust the Size of the QR Code |
In the new pop-up menu, click on "Size," and make sure that the aspect ratio is set to "Lock." Then use the arrow keys to adjust the QR code to the size you want. Then click "OK."
 |
| Follow the Steps to Adjust the Size |
If your QR code is not centered, simply click and drag to the desired location.
Finally, save your document, print, and post in your room. It's ready for your students to use!
 |
| Print Your Finished Document! |
I hope you have enjoyed reading about creating your own QR codes for free. If you do this for all the Internet sites you want your students to use, you will save yourself oodles of time in your classroom, plus you'll have far fewer interruptions during center time.
I would love to hear your experiences with QR codes, or any suggestions you might have for future posts. Please leave a comment below.
"See you" next time!
No comments:
Post a Comment