Showing posts with label Social Studies. Show all posts

Monday, February 29, 2016

Fourth Grade Social Studies Vocabulary Word Wall Cards

With new curriculum, as well as new CCSS for social studies, come new opportunities for creativity. I wanted vocabulary word wall cards for important social studies terms, and I wanted them to have clear, kid-friendly definitions, pictures, and large type to be seen from a distance. You would think the new curriculum would come with this, but when it didn't I had to create my own. (The first part of this post has to do with materials to match the California curriculum. When I moved to Tennessee I created materials to match the Tennessee curriculum. Those materials can be found towards the end of this post.)

Obviously, I needed a set of cards which would have both the vocabulary from the new textbook, as well as the required vocabulary from the new CCSS. Of course, it did not exist yet, which is where the creativity comes into play. :) I got to play on my computer to create a new, comprehensive set.  The first set is Unit #1: The Land and Its People. This unit has a lot of geography terms, as well as some information about early Native Americans. Here's a sample page with three of the cards.

Sample Vocabulary Cards


This pin shows all the pages of the cards. There are 45 vocabulary cards in all!

The Land and Its People


You can find these vocabulary cards in my TpT shop here. I make more resources to go with the units as I have time, so click on the "Follow" button to be notified when I release new materials.

*Update: I've created six sets of these cards to cover the full year. If interested, you can find all six sets in my store, or bundled for savings here.
Social Studies Vocabulary Cards Bundle

When I moved to Tennessee I had to create a whole new set of cards to match the curriculum in my new state. While there is some crossover, many of the cards have different vocabulary. You can find my Tennessee social studies vocabulary cards here, by individual set, or bundled for savings.
Tennessee Social Studies Vocabulary Cards Bundle

I've done a lot of Internet research for the new curriculum. If you teach geography terms or early Native American history, you might want to check it out. Here's a screen shot from one of my Pinterest boards. I've already pinned lots of links to information on early American history to this board. You can only see a fraction of the links from this one screen shot. Click on the image to visit the board. You can also follow this board to receive notifications whenever I pin something new to it.


Thanks for reading my blog! Have a wonderful holiday weekend!

"See" you next time!

Sunday, February 28, 2016

U.S. History Resources at Your Fingertips!

Our social studies teacher's manual has all these wonderful links and book suggestions for teaching U.S. history. The problem is, who has time to look them up? When you come home exhausted, with papers to grade, lesson plans to make, and a family who needs your attention, how do you find the time to search out and organize all the extra materials suggested by the book?

Finally I decided to go through the TM chapter by chapter and add all the books, websites, and other links to my Pinterest boards. That way all the enrichment materials would be available in one place for my perusal. I realized that other teachers could probably use the links, too, so here they are.

My Social Studies Boards
This is what my social studies Pinterest boards look like right now. Carol's Garden is my product and blog board for my TpT store, but the next seven boards are reserved for all the links, websites, books, videos, etc. that are suggested by our U.S. history curriculum. Most of them have MANY links and ideas I've come across on my own, as well. 

Economy for Kids
The first history-based board I have is called CG (for Carol's Garden) Economy for Kids. This is where I put all the book titles, videos, and other working links suggested by our text to help teach economic ideas to students. I haven't added much of my own ideas to this board yet, but will as I come across useful material.

CG Early Native Americans and Geography
The second board is currently my favorite! Every geographic term I could find is illustrated, every paleo animal I found is shown, and all the books, websites, videos and other information about Native Americans suggested by our text is linked by pin.

CG Age of Exploration
My third history board includes links to information about the explorers who came to the New World, plus any links I could find to suggested lesson materials for the unit.

CG
CG Colonial America
Colonial America is covered on the fourth board, up to the 1800's.

CG American Revolution
Of course, the fun really starts with my fifth history board, which covers the American Revolution. This is one of my favorite subjects to teach, hands-down. We talk about the men and the women behind the Revolution, the spies, the heroes and the traitors. My students always enjoy this one!

CG Creating the New Nation and Government
The seventh board is one of the most important. These materials are selected to teach students about the U.S. government, explain how it was set up by the Founders, and encourage students to be informed citizens today.

CG New Frontiers and Westward Movement
The growth of the United States from thirteen original colonies to a trans-continental nation is covered on my eight board. Students are encouraged to consider multiple perspectives as they examine the motivations of the Native peoples as well as the U.S. government during this unit of study.

These pictures only show a small fraction of the hundreds of resources pinned to these boards. If you teach American history, you know the value of having all these resources at your fingertips. Anything that can save any teacher's time is valuable. I hope you find these boards, with all their pins, useful to you, as well. I hope you have a fabulous year. :)

"See you" soon!

Monday, August 24, 2015

Archaeology and the Distant Past for Interactive Notebooks

This is a re-post of my blog from last year.

Time to plan the next Interactive Notebook lesson for 4th grade social studies! My teacher's manual recommends quite a few websites which show pictures of Native American petroglyphs, pictographs, and mud glyphs as a place to start. I linked all of the functioning sites to my Native American Pinterest board, which you can link to here, or simply click on the image below. (I'm constantly adding more resources to this board, so if you are reading this post long after I uploaded it, you might have to scroll down a bit to find these images.)

CG Fourth Grade Social Studies: Early Native Americans


You'll notice that the first two images on the board are books, including one called Archaeologists Dig for Clues. I don't see this book as a good read aloud, but I think it would be excellent for use in a  center. It explains why, where, when, and how archaeologists dig, and what they might find. It's also a small, inexpensive paperback, which makes it possible to purchase several copies for center use without breaking the bank.

To actually introduce the topic, I would instead use this short video about archaeological digs from Tennessee History for Kids. (It's not just for Tennessee.) Just click on the picture to reach the links.

Mississippian Dig Video

The nice thing about this site is that they provide links to the video in three different formats: QuickTime, Windows Media Player, or YouTube. I appreciate the options, as I've been at schools which don't allow one or more of these. Once you reach the page, scroll about halfway down until you see the matching picture. Then click on the desired link to watch the video.

I love how this video shows the steps used by archaeologists, from choosing a site, clearing the land, measuring it into grids, carefully excavating, then sifting through the dirt to find the artifacts.

Some students may wonder why scientists don't often find cloth or other "soft" items during a dig. This informational graph might be helpful. It shows the decay rates of everyday materials left behind by humans.

Decomposition Rates of Common Materials
The graph shows how natural materials, such as plant and animal fibers, decay much faster than man-made materials. While ancient people did not have the ability to create glass or plastic, they did leave behind bones and stone tools, as these items take much longer to decompose than skins or cloth.

I would introduce the lesson vocabulary, and give students these cards to complete during center time. One side of the cards has space for the vocabulary term and sentence, while the other has room for the definition and an illustration. These cards will be stored in the envelopes students glued into their Interactive Notebooks last time. (I've included both blank and completed cards to give you an idea how I've set them up.)

Blank Vocabulary Cards Front
Blank Vocabulary Cards Back
Example of Front of Completed Vocabulary Cards
Example of Back of Completed Vocabulary Cards

The graphics I used for these examples come from Teachers Resource Force. You can find them here and here. I don't have these vocabulary cards in my store yet, but I plan to add them once I finish planning this entire Native American unit.

Next would come the actual reading of the lesson. Sometimes I choral read this with students, sometimes I use call and response, and sometimes I have students read the lesson in pairs. I also like to put the audio CD at a computer station for students who need extra help decoding, or who are absent when the reading is done in class. I NEVER assign fourth grade students to read the text at home as a way to cover the material. If they want to take the book home to re-read the lesson or to study, that's fine.

There are discussion questions at the end of the lesson, but it drives me crazy how these are never written down anywhere except in the book. I like to have students work in cooperative groups to answer these, and I don't like to have them waste precious class time re-writing each question. To save the students some time, I created these discussion response cards.


These cards could be used in many ways. They can be exit tickets, study guides, task cards, or INB pieces. I'm not thrilled with the low level of questioning here, but I'll add my own questions verbally, as I teach the material.

The next class period I would review a section of the text and give a lesson on main idea and details. Since I knew the lesson had three details to go with the main idea, I chose a triangular pattern for the graphic organizer. I would have the students cut out the following INB foldable during morning announcements, then save it for our social studies lesson later that day.

Main Idea and Details Foldable w/o Lines

Main Idea and Details w/Lines

In our text, the lesson is about the Paleo and Archaic Native Americans who inhabited the land before written history began. You text may be vastly different, which is why I am showing our results as an example only. Plus, some of my students need help keeping their printing straight (hence the graphic organizer with lines) while others like the freedom of an organizer without lines. Here's what our completed foldable would look like.


For the main body of at-level students, this same graphic organizer could be used for other lessons in the chapter, to be completed independently. For struggling students, I would pull them into a small group and continue to model the procedure until they were able to successfully complete it on their own. (For some, this may take many months of practice.) For more advanced students, I might ask them to each take a different section of the text, complete the chart, then switch papers to correct each other's work.

I also want to include a lesson on comparing and contrasting the Paleo Indians with the people of the Archaic period. I'll have a graphic organizer/foldable for the students' Interactive Notebooks, plus I'll share some ideas for anchor charts I've found to help teach this reading and writing skill. Check my next blog post to see these.  :)

Please make a comment below about anything you've seen in this post. I would love to hear from you!

"See" you next time! Have a fabulous week!

Thursday, September 25, 2014

Interactive Notebook Lesson for Comparing and Contrasting Paleo Indians and Archaic People

As promised, I'm back with an Interactive Notebook template for comparing and contrasting early North American peoples. I've also included an anchor chart and a sample summary for the lesson.

Here's the INB template I designed for this lesson. I would have students cut this out during morning announcements, then store it in the envelopes in the back of their notebooks until time for the writing lesson. Since this is a cross-curricular skill lesson, I would take time during both the writing block and social studies as needed to finish.

Paleo vs. Archaic People Front Sample


The copy I give to students would actually be blank where I currently have clipart showing people of the time. I want them to use their own illustrations, but this is an accommodation you could use for absent or struggling students. I designed this starting with a completely blank template I downloaded from Tangstar Science here.

Paleo vs. Archaic People Blank Front


I would have my own copy of the blank template projected on the Interactive Whiteboard, so that we could complete this as a class. This is what the inside would look like.

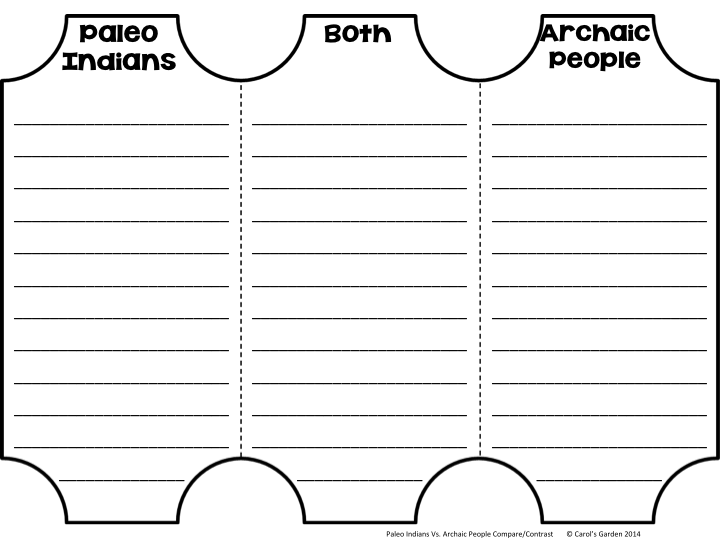
Paleo Vs. Archaic People Blank Inside
As a class, we would come up with descriptive items to fill out the chart. Differences go under the specific people, while similarities go under "Both." For instance, Paleo Indians lived when the Earth was much colder, while Archaic people enjoyed a climate and environment much like today's. However, both were hunter-gatherers. However, the Paleo Indians used sticks and spears to hunt large animals, while the Archaic people developed the atlatl to enable them to hunt smaller animals with greater accuracy. Here's a video from PBS showing the design and use of the atlatl.

PBS Atlatl Video


By the time we finished filling out our chart, I would expect it to look something like this:

Paleo Vs. Archaic People Sample Inside
This foldable chart would be glued into the Interactive Notebook, but we wouldn't stop there.

Next, I would project this blank anchor chart, which I would fill in front student suggestions, while students worked on their own copies.

Blank Compare Contrast Anchor Chart
We would talk about the use of signal words to show when we are comparing two like items, or contrasting two items which are not alike. I would encourage students to come up with these signal words to fill the chart. (If students had difficulty with this, I would have them pull out a previous comparison/contrast article from a different assignment and have them search for the transition words.) This is what I would expect the chart to look like by the time we finished creating it as a class.

Once the anchor chart and Paleo vs. Archaic People foldable graphic organizer were complete, we could proceed to the compare/contrast summary paragraphs. Of course, your own curriculum probably differs from mine, but here is a sample of what I would be working on with my students.

Compare/Contrast Paleo vs. Archaic People

I love typing this sort of thing on the computer while students watch, because it shows the ease of editing from a computer program. Fourth graders need encouragement to type on the computer, and this is one way I try to encourage them. I also think it's a good idea to go back as a class and highlight the comparison/contrast transition words. It's an effective way to remind students to look for these words in their own writing later.

Completed Sample with Highlighted
Compare/Contrast Transition words
Once students have completed these steps together as a class, I would have them complete similar activities for later Native American groups. My struggling students would probably continue to need small group support to be successful at this, while my high groups would be able to fly on their own. By far the largest group of students would need modest support, and we would continue to complete more of these types of assignments as the weeks progress.

As a quick response, I would ask students to compare and contrast two items of their own, such as two types of animals, or two sports teams, and write a brief paragraph about it in their journals.

I hope you've enjoyed reading about using Interactive Notebooks for comparison/contrast lessons. If you are interested in purchasing this lesson, check out my store here. Thanks for stopping by! Please leave some feedback below!

"See" you next time!

post signature

Sunday, September 7, 2014

Bill of Rights and the Interactive Notebook for Constitution Day and 9/11

Okay, so I am wayyy behind where I wanted to be with Interactive Notebooks for our new social studies curriculum. I forgot about the fundraising assembly last week, which put a total crimp in my lesson plans, and I am scrambling to make up for lost time. With Constitution Day coming up on September 17th, and the awkwardness of September 11th (exactly how much detail are we supposed to go into with our kiddos about what happened on that horrible day before they were even born but which adults remember all too well?), I decided to combine both events into one social studies lesson for our Interactive Notebooks.


I've been trying to read up on the process, and find out just what it is supposed to look like in a classroom. There is a group of teacher-seller-bloggers led by Jennifer of 4mula Fun, and they are hosting a blog hop explaining how each of them implement the process in their classrooms. Their posts include information on math and science classrooms, plus general set-up information. This last part is what was helpful for me, as I will be using Interactive Notebooks for social studies lessons.

Last time, I created sample covers, rubric, and a table of contents. You can find that post here, or listed for free in my store here.

I think my greatest challenge will be keeping the notebooks truly interactive. I will need to constantly remind myself that I want students to think and respond, not just copy what I create. Since I'm so nervous about this new (for me, anyway) teaching technique, I decided to start with a lesson I have taught in the past, but adapt it for Interactive Notebooks.

First, I created a "window fold" template in PowerPoint. (Someday I need to learn how to use my Adobe Illustrator program so that I can create crisper images for my templates, but that will have to wait for another day! :) I knew I would need a total of ten flaps for each of the ten rights guaranteed by the Bill of Rights. I also wanted there to be room for a student-friendly definition of the right, as well as some type of visual.

Blank Front

Blank Inside of Window Fold


Once I had the template designed I printed out a sample (double-sided) copy and played around with it. I wanted to see what the finished product would look like before I used it with students. Each flap would have the name of the right on the front, with a definition and visual behind the flap. I planned to fill the information out together as a class, using a document camera for the sample.

We would discuss the concerns the Founders had about having a strong central government (as organized by the Constitution) and the perceived need for a "Bill of Rights" to be added after ratification of the new Constitution had taken place. I also planned to briefly mention the fact that not all countries considered human rights to be rights at all, and some people wanted to force others to believe and act as they do. (I do not want to delve too deeply into the issues surrounding September 11, but students need to understand why we need the Bill of Rights.)

Once I had messed up several samples, I went back to the computer and sketched out the changes I planned to make with the class. I'm not very good with drawing, so I added some clipart to give you an idea of what this could look like if you decide to use it in your own classroom. Of course, I would have the students do something much simpler.


I also wanted to plan the "interactive" part, and leave room for students to respond to the Bill of Rights in a personal way that would be meaningful to them. So, I decided to give students a choice of possible responses. Students would need to choose one of the ten rights (at first I was thinking at least three, but since this is the beginning of our Interactive Notebook journey, I decided this would probably be too much.) For this right, students would need to choose a response based on one of the following prompts.

1. What does this right mean to you, personally?
2. How would your life or the lives of your family members be different without this right?
3. Give an example of a country where this right does not exist. How is it different than the United States?
4. Do you agree that this should be a right guaranteed to everyone in the United States? Why or why not?

Since I didn't want students to spend all their time copying the response questions, I decided to type them up, make copies, cut them out, and have them available for students to glue into their notebooks. That way, they would have more time for the important part, which would be their actual response. I made them with both boy and girl copies.

Meaning for You?


Lives Different?

How Different?

Rights for All?

Finally, I found a Bill of Rights Rap to explain the amendments in a student-friendly way. It's kind of cute. Check it out!


You can download all the pages I created for this lesson by clicking here, or on their images on this post. These pages will not be available in my store at this time, but might be at some later date. Please follow my blog for more posts about my journey with Interactive Notebooks.

Update: Please leave some feedback. So far, 423 people have read and downloaded, but no feedback. It's disheartening. :( 

Thanks for stopping by! "See" you next time!

post signature

Tuesday, August 26, 2014

New Social Studies Curriculum Means Interactive Notebooks and Freebies!

I've always wanted to try interactive notebooks. Two years ago I tried to get my team interested in using interactive notebooks for our math block, but they weren't interested. Since we team teach for math, it's either we all do it, or nobody does it. I was frustrated, but in the back of my mind I kept looking for another opportunity.

The chance came this year. I'm not with the same team, and we have a new social studies curriculum, which just begs for some innovation. I'm a bit nervous, but I finally decided to jump in with both feet and create social studies interactive notebooks for my own class this year. I'm sure I'll make plenty of mistakes, but I definitely want to give interactive notebooks a try.

This will be my first post, in what I hope will be a year-long series on using Interactive Notebooks for fourth-grade social studies. If you teach a different subject or grade level, I hope you will still follow me on my journey, especially if you, too, are interested in implementing Interactive Notebooks in your classroom.

After looking through my new social studies curriculum, I had to decide what I wanted to emphasize, and where to start. We have new Common Core State Standards for Social Studies in Tennessee this year. After reading the CCSS, I was surprised to see that our new textbook was not aligned to the new standards! I would have to supplement the text in some areas, and streamline it in others, in order to teach the key ideas I needed my students to master.

In the meantime, all students will need notebooks in which to create the notes and store the foldables created in class. I created these simple Back to School Editable Supply Lists, which you can get for free in my TpT store here.

Editable Supply Lists for K-6


You can either send this home with your "Back to School" letter to parents, or whenever you want your students to bring in classroom supplies. I have spiral notebooks on my list, but you can use composition books if you prefer. Just keep in mind that foldables for composition books need to be copied at about 64% the ordinal size in order to fit in the smaller books.

Once students have their spiral notebooks, it's time to personalize and organize them. I think of this sort of as like setting up an empty filing cabinet by putting labels on the outside of the drawers and colorful hanging file folders inside. I want the notebooks to be both functional and attractive, with no two exactly the same, just like no two students are exactly the same.

For this reason, I encourage students to create and decorate their own covers for their notebooks. The only things I wanted to be sure they included on the cover were the subject, their names, and my name. My artistic students love this freedom, and happily grab blank paper and get to work.

However, I have some students who require a bit more direction, so for these students I created the following cover, which you can download free from my TpT shop here. Remember, if you are using composition books instead of spiral notebooks, you will need to copy this page at 64% of normal in order for it to fit on the composition book. :) I created these for the various school subjects, but purposely left them rather "blank" to leave room for students to personalize them. :)

Language Arts Cover

Reading Cover

Writing Cover

Math Cover

Science Cover

Social Studies Cover


I decided to introduce the notebooks before lunch, then have this paper available on students' desks after they returned. I also tried to make it clear to students that if they wanted to create their own cover from scratch that I welcomed them to use blank paper, and made that available, as well. I wanted to give students the opportunity to think about the design of their covers, before they actually had to put color to paper. Introducing the assignment prior to lunch gives students that time.

After lunch, students were directed to get to work on their covers, and were given 20 minutes to do so. If they were not finished at that time I told them they were to finish it whenever they had extra time during the week, or they could take it home and finish it for homework. While they were working on their covers, I had several parent helpers come in and gave them directions for the next part of the project. I placed one parent at each table group, so that they would be extra eyes to spot any problems and redirect any students who needed help. You can find the form I used to ask parents for help here. (It's not in my store. It's just for my blog followers.)

Add your own date, time, and signature to this form.


Next we got to work on the Rubric for the notebook. Although I knew that we could just fill out this page as we went along, I was afraid that if I didn't have something for my students to glue into their books at this point, they might forget to leave space. So I directed my kiddos to cut out the page and glue it into the front of their notebooks. Parents were great at making sure students glued this in the correct spot in the notebooks, and that they used only a little bit of liquid glue. "Just a drop, not a lot!" I heard them say over and over again. :)

Sample Rubric


We went over the items on the rubric, and discussed the importance of doing their best work on everything that would go inside. When I told them that they would be able to use the notebook on tests, some of them perked up and seemed to take extra effort, but others seemed clueless. I figured that would change after the first test, though. ;)

Then we talked about the importance of having a Table of Contents in their notebooks, so that they would be able to quickly find the information they needed. I made this Table of Contents page, which you can also find free in my TpT shop here.

Table of Contents (for you to fill out as you go)


Some students take longer than others to finish, and some kids tend to lose small pieces if they have to come back to the assignment later. For this reason, it is a good idea to have students glue some type of envelope or large baggie to the inside back flap of their notebooks. That way those small pieces will still be there when they return. :) I like the 9" manila envelopes, but you can use whatever works for you.

Envelope for storing small pieces


Finally, we numbered the pages. At this point, I was really glad I had all that parent help in the room! I had asked parents to make sure all the students in their little groups numbered the same pages in their notebooks at the same time as everyone else in the group. They were able to keep the kids on track to correctly number the pages of their Interactive Notebooks.

As each table group finished organizing their notebooks, they were directed to clean up their trash, leaving the notebooks on their desks to dry. They pulled out their texts and began to read the posted assignment, while the other groups finished the task. One by one I thanked the parent helpers and sent them on their way. When the last student had finished and the last parent had left, I was ready to begin my next lesson, knowing that student notebooks were ready for the next day.

I was fortunate not to have any absent students during this activity, but if I did I would make sure to collect the blank notebooks from their desks and complete the set-up for them. Those students could always decorate and personalize their notebook covers on another day, but if they did not have the basic organization ready when it came time for me to teach the lesson, then those absent students would quickly fall behind. This is also a job you could give to your parent helpers to complete.

I hope you enjoyed reading about the beginning of my adventure into the world of Interactive Notebooks! You can find all these forms (except the parent volunteer page) in my TpT store, or by clicking on this graphic.

Interactive Notebook Freebie
Follow my blog if you want to receive notification whenever I post something new! Just click on the "Bloglovin" or "Google Plus" buttons at the right. Please take a moment to leave some feedback! Thanks!

"See you" next time!
Related Posts Plugin for WordPress, Blogger...